If you would like inspections to be reviewed and edited in the office and then marked as approved, you can enable the Inspection Approval feature. Only a module Administrator can change approval settings. This tutorial applies to the following modules:
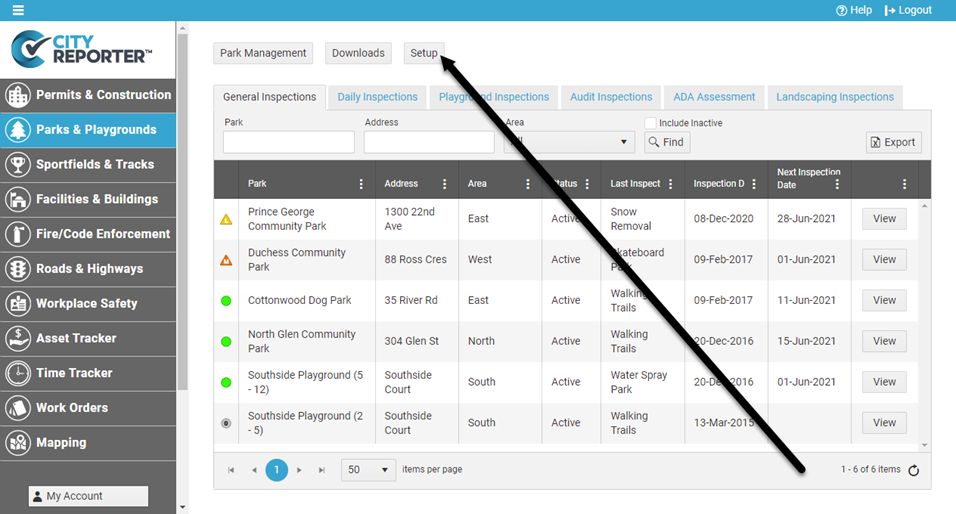
1. Using your computer, log into CityReporter web with your city code, username, and password. Select a module and click the Setup button at the top of the screen, as shown. You must have Administrator permissions in order to access the Setup button.
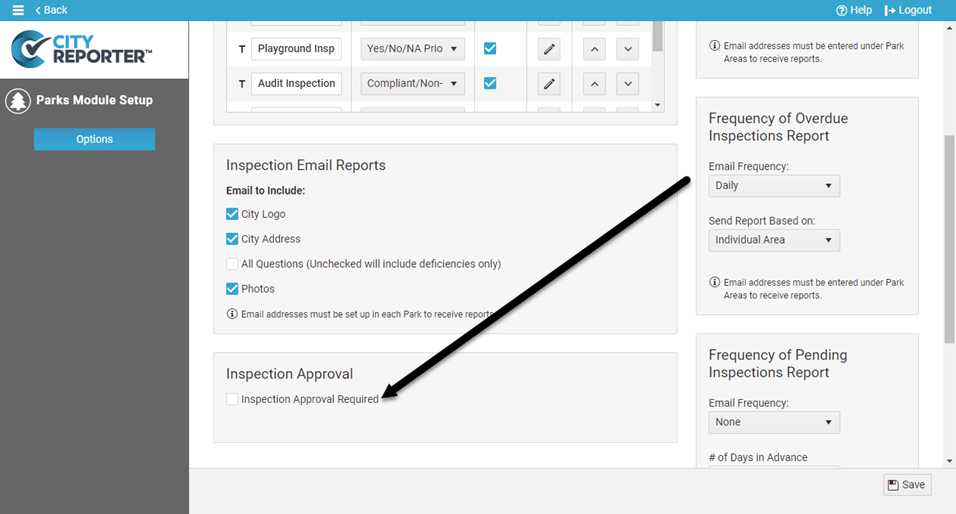
2. On the module’s Options/Form Management screen, check the box for Inspection Approval Required.
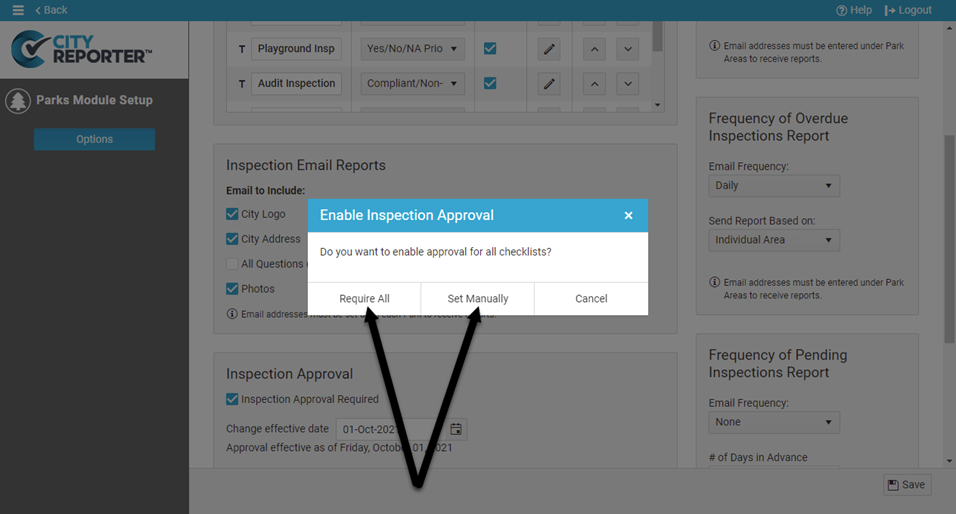
3. Once the Enable Inspection Approval dialog box appears, you can choose to require approval for all inspections by clicking Require All, or you can choose which forms you want to approve by clicking Set Manually.
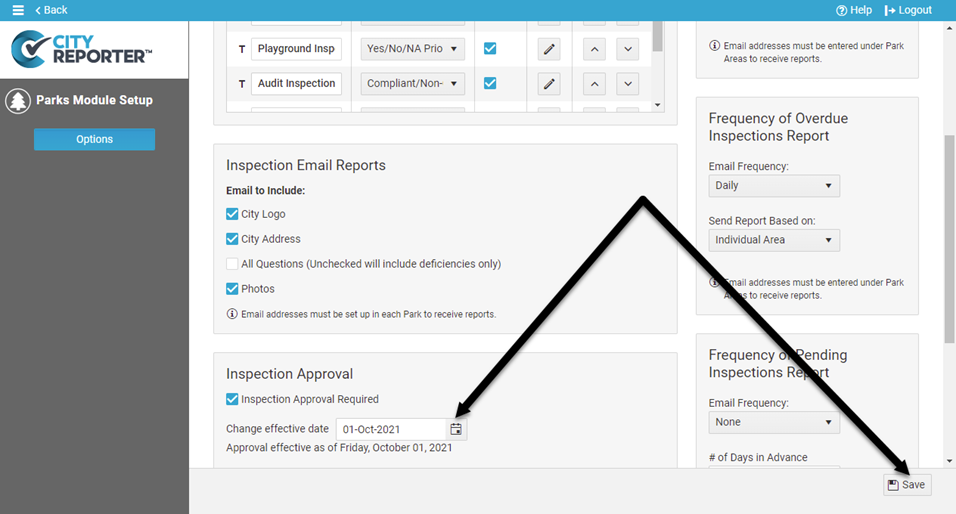
4. Regardless of which option you chose, a date option will appear underneath “Inspection Approval Required”. This is the date you would like to begin requiring approval. You can back-date to require approval for any previous inspections that have been completed. Make sure to click the Save icon at the bottom right of the screen once you have set the date.
5. To manually choose forms for approval, click the Edit button next to an Inspection Group.
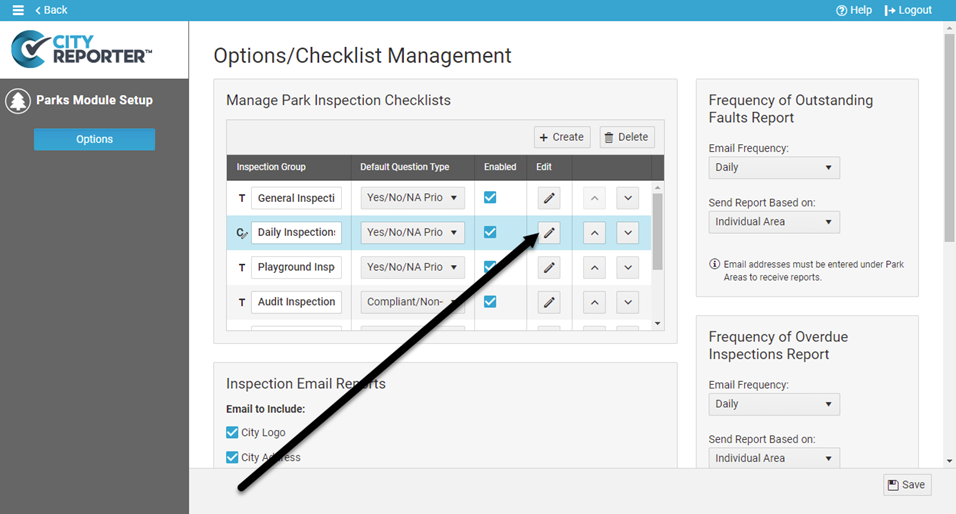
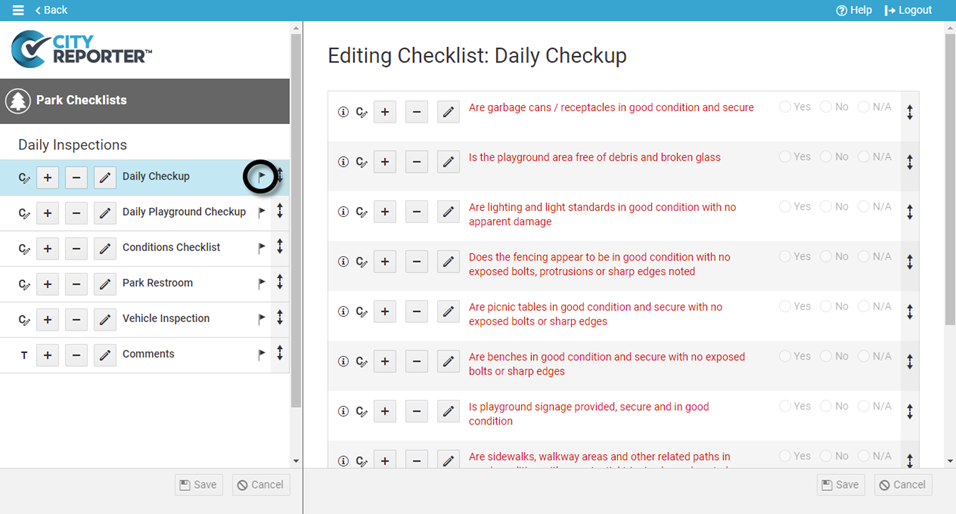
6. If you selected “Require All” in step 3, a flag will appear next to each form in every Inspection Group of the module, as shown.
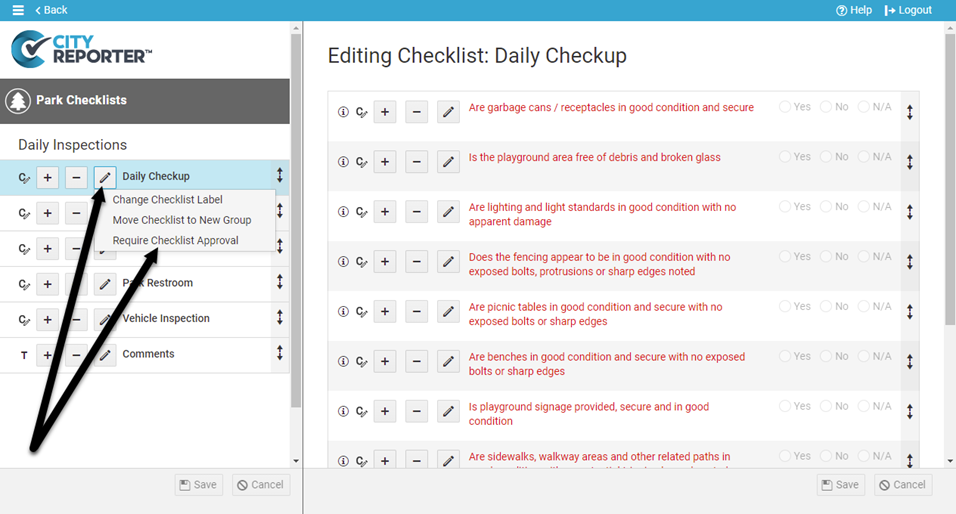
7. If you selected “Set Manually” in step 3, no flags will appear. To set inspection approval for an individual form, click the Pencil button next to it and select Require Form Approval.
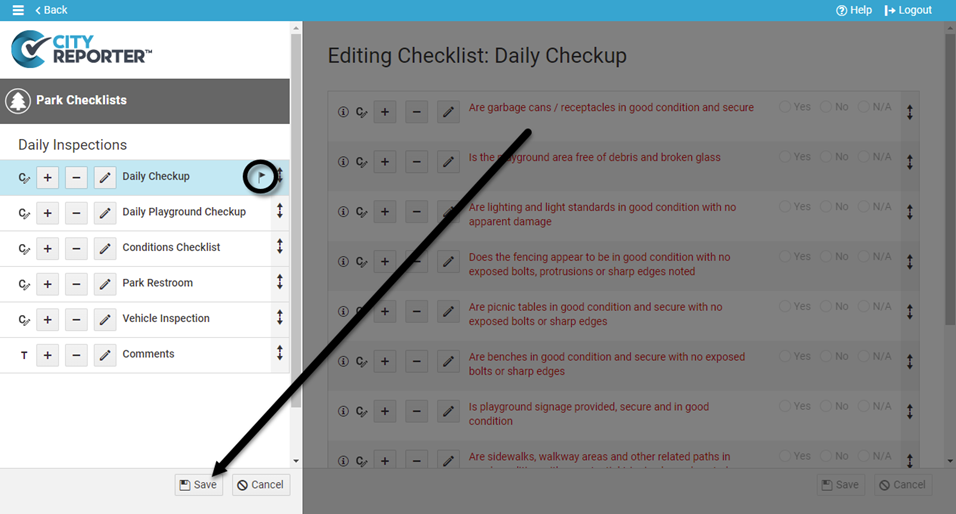
8. A flag will now appear next to your form. Repeat for any form you would like to require approval on. Click the Save icon at the bottom left of the screen to save your changes.
To learn more about the Inspection Approval feature, see our tutorial How to Edit and Approve Inspection Records.


