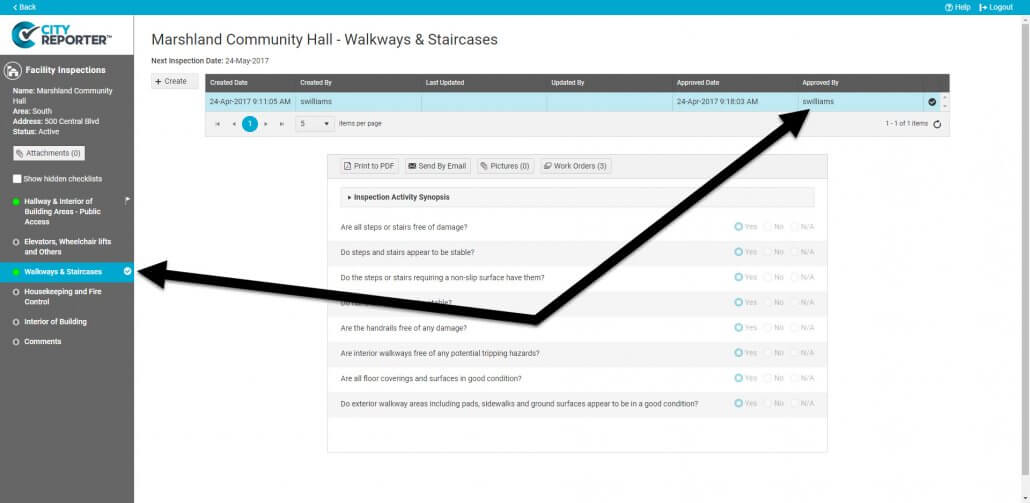
If your inspections require approval, an Administrator will need to go into CityReporter web and approve them after the inspection has been filed. This feature ensures that your finalized inspections are double checked so they are free of spelling errors or other mistakes.
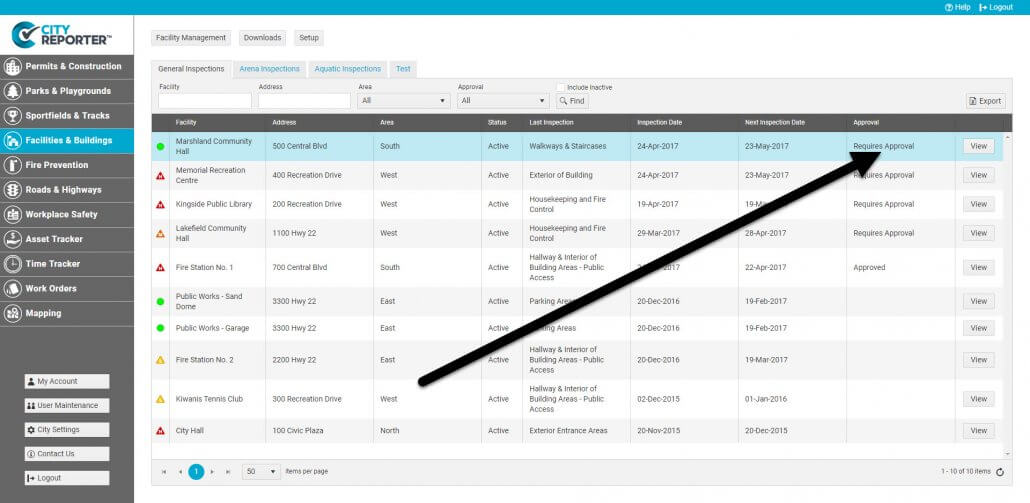
1. Using your computer, log into CityReporter web with your city code, username, and password. Next, select the module where your inspections require approval, and you will see an “Approval” column. Open a location marked with “Requires Approval” by double-clicking on it or clicking the View button. (If there is no “Approval” column, you need to activate the Inspection Approval feature for the module. See our tutorial here.)
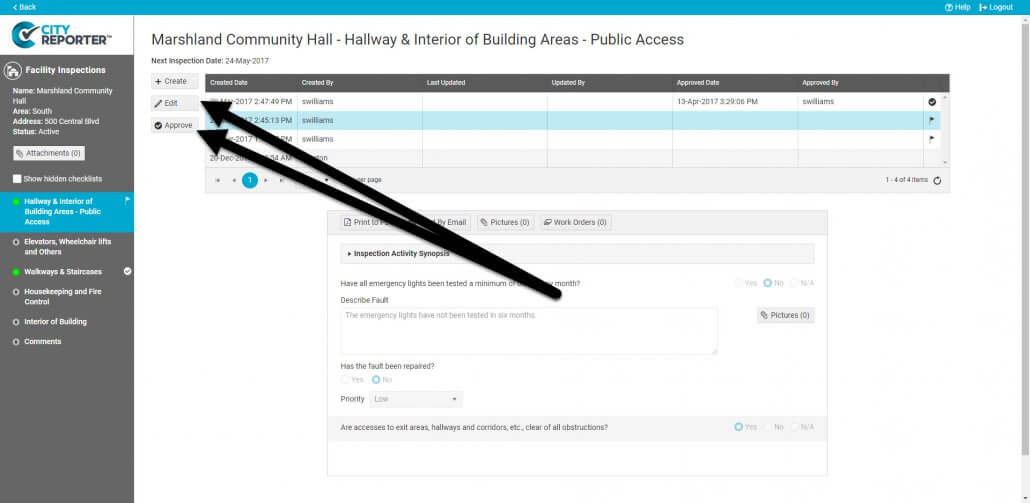
2. Forms with inspections requiring approval are marked with a flag icon. When you select one of the inspection records, you will see options to Create, Edit, or Approve inspections at top of the screen. Before editing, click Print to PDF if you want to have a copy of the original inspection report. Then click the Edit button to make changes to the content of the inspection.
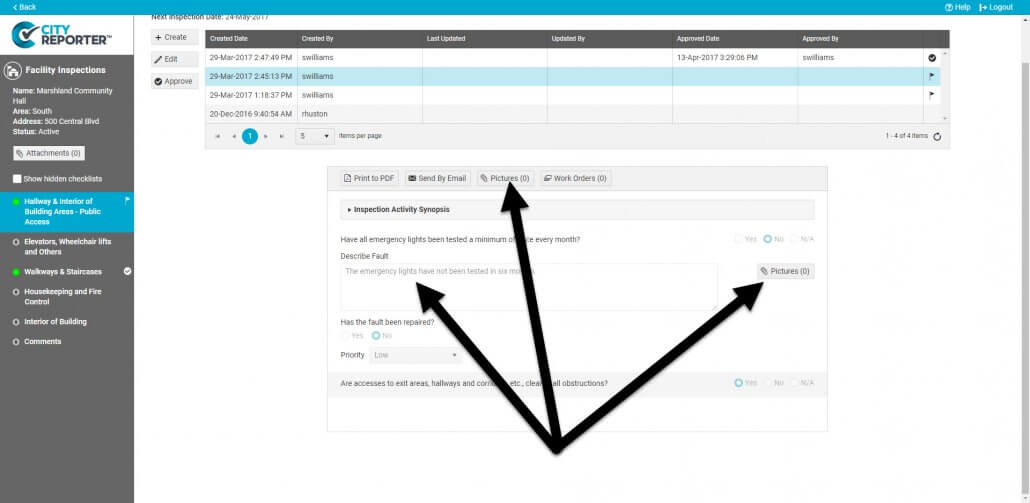
3. When editing, you may want to look for spelling mistakes, as mobile users may make errors when completing inspections on their mobile devices. You may also want to add picture attachments that were not added during the inspection,.
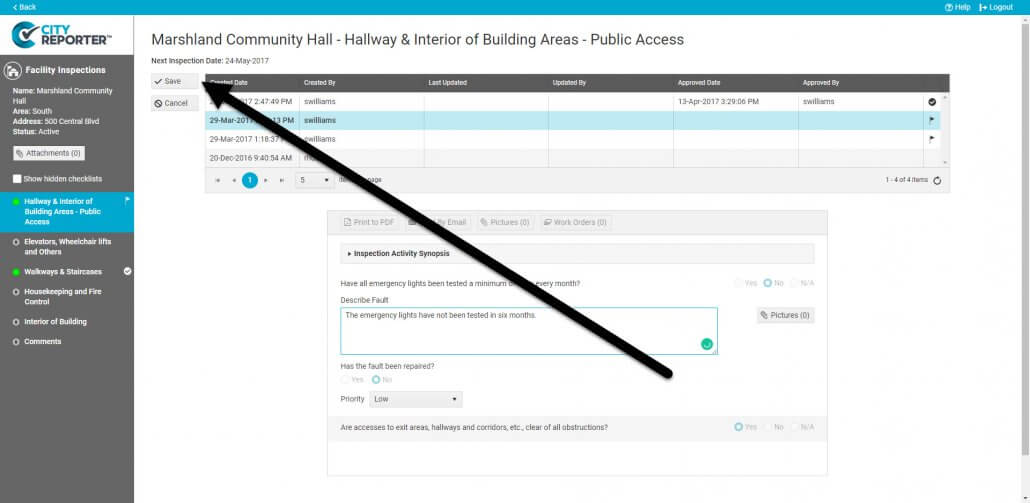
4. Once you are done making edits, click the Save button at the top of the screen. When you save, the original inspection report is overwritten with the edited report.
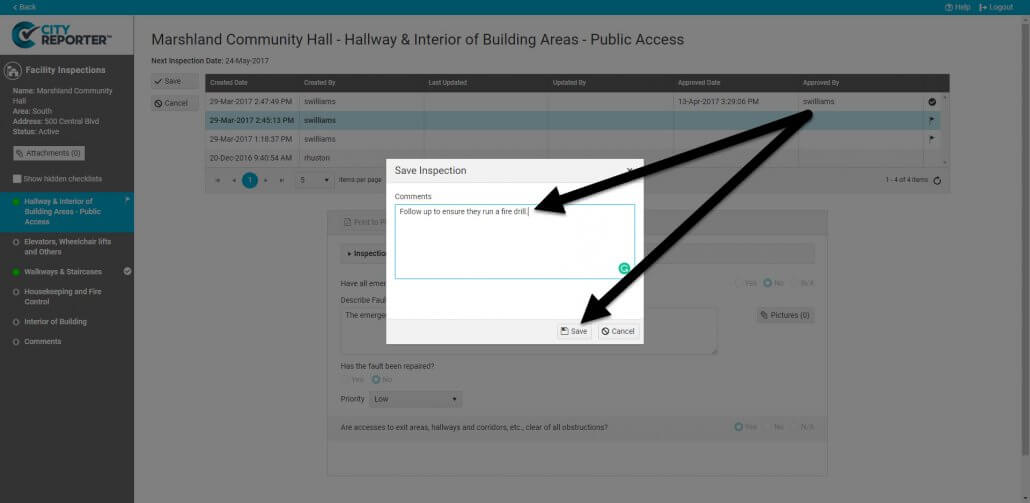
5. After clicking Save, a dialog box will appear when you can add comments and set a date for your next inspection. These comments are visible at the bottom of the final inspection report.
6. Once you have made all necessary changes and are ready to finalize the inspection, click the Approve button. Once you click this button the inspection report cannot be edited further.
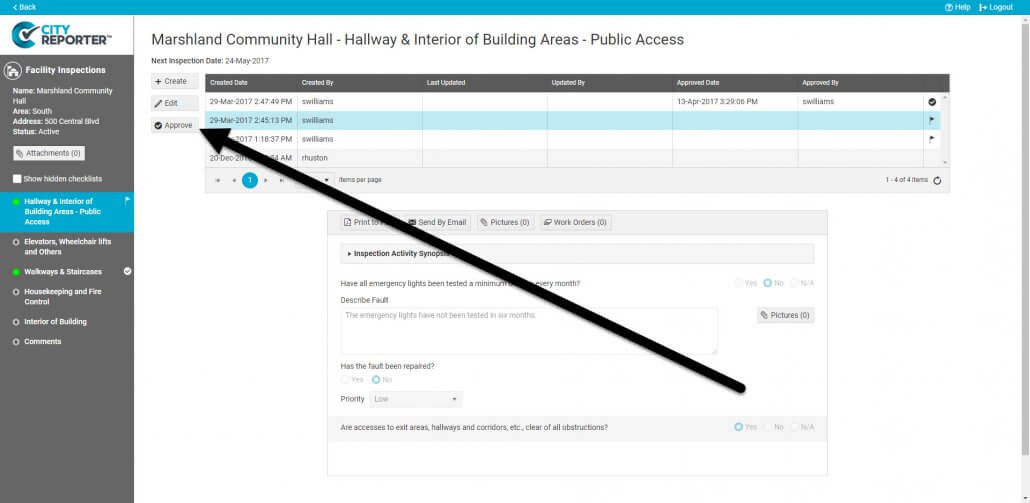
7. Once the inspection is approved, you will see the approver’s username in the “Approved By” column at the top of the screen. After all inspections under a form are approved, a checkmark appears next to the form on the left side of the screen.
