Every work order begins with a Job Sheet, and all of our Job Sheets come with three basic fields: Assign To, Location, and Describe Job. You can add more fields for any other information you would like to record on each work order. The Job Sheet is a general form with basic information, while Tasks are meant to be more specific. For instructions on how to create and edit Tasks, check out our tutorial How To Create and Edit Work Order Tasks.
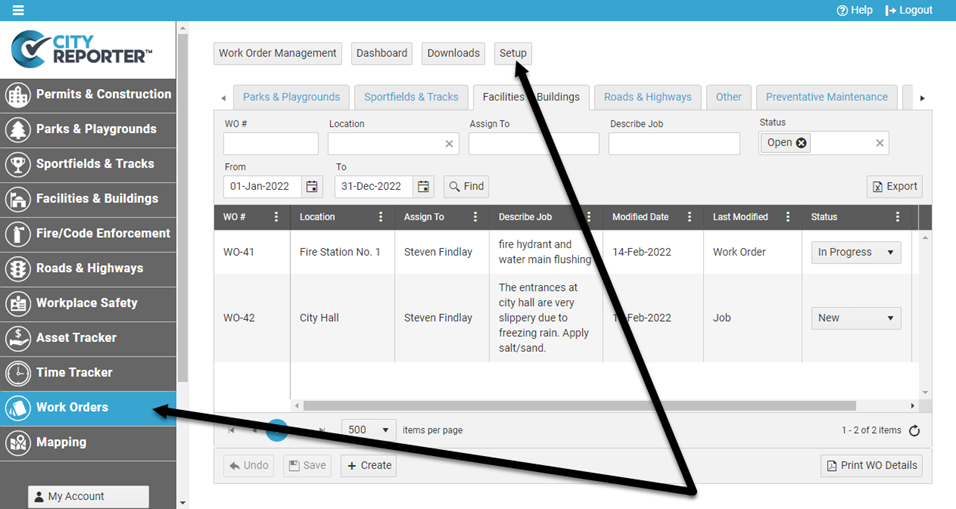
1. Using your computer, log into CityReporter web with your city code, username, and password. Select the Work Orders tab on the left and then click the Setup button at the top of the screen, as shown. You must have Administrator permissions in order to access the Setup button.
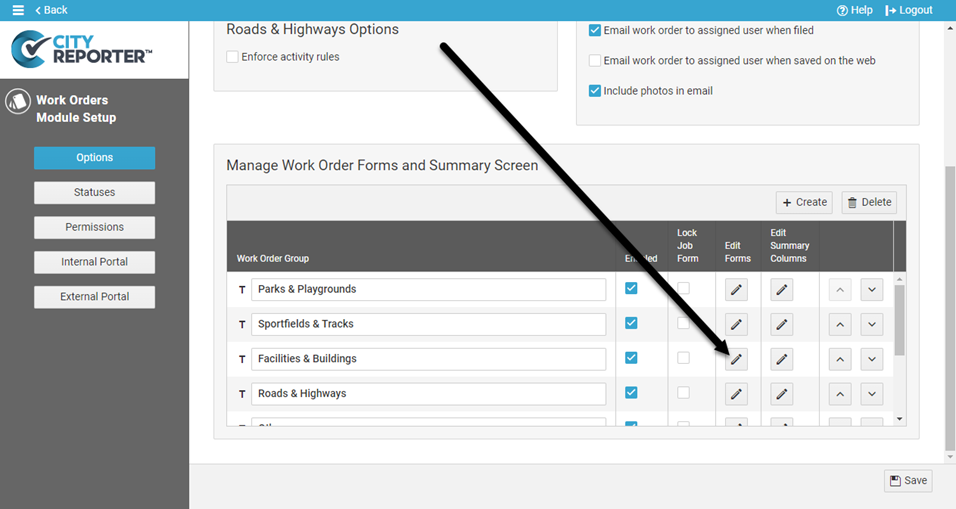
2. In the Manage Work Order Tasks and Summary Screen table, find the group with the Job Sheet you would like to modify and click the Edit Form button next to it.
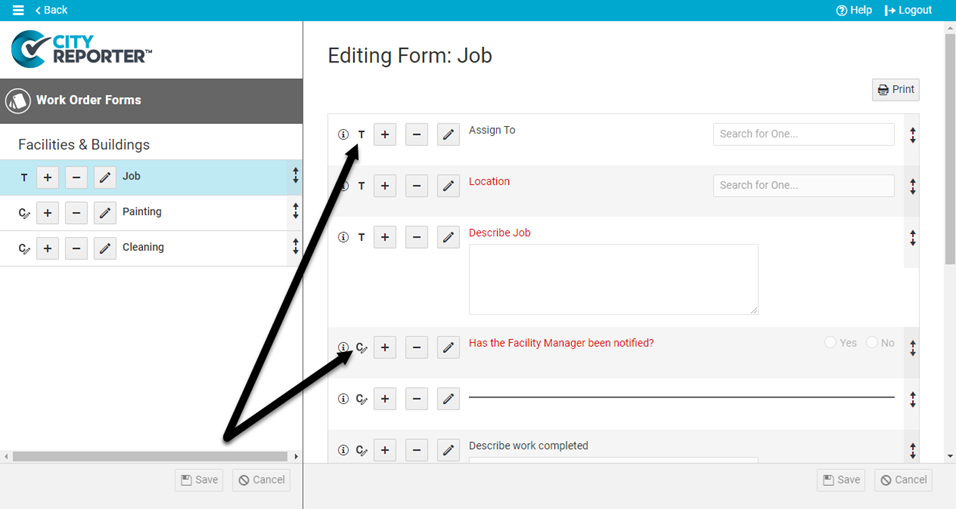
3. The Job Sheet includes some template questions to get you started. Questions with the T icon are part of the template and can’t be deleted. Custom questions that you add to the form are marked with a C icon.
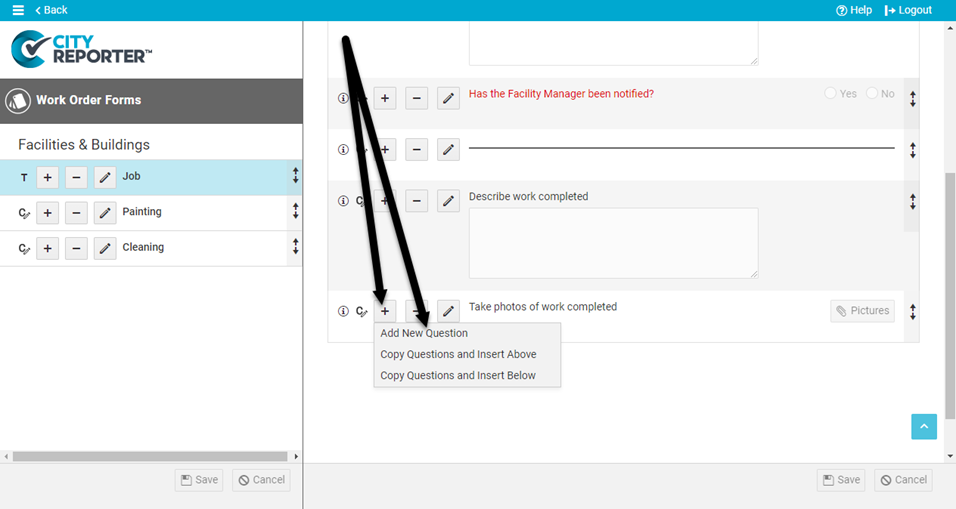
4. To add a new field to your Job Sheet, click on the plus button next to one of the questions and select Add New Question.
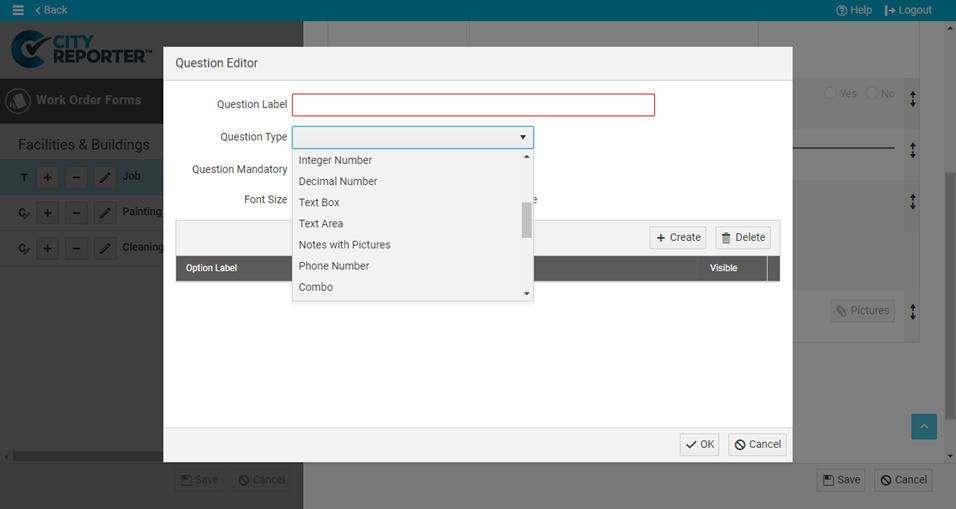
5. For each question, enter a Question Label and select a Question Type. You can make the question Always Mandatory or Only on WO Completed (see Mandatory Options for Work Orders for more info). Set formatting options if desired. To add the new question, click Ok at the bottom of the window.
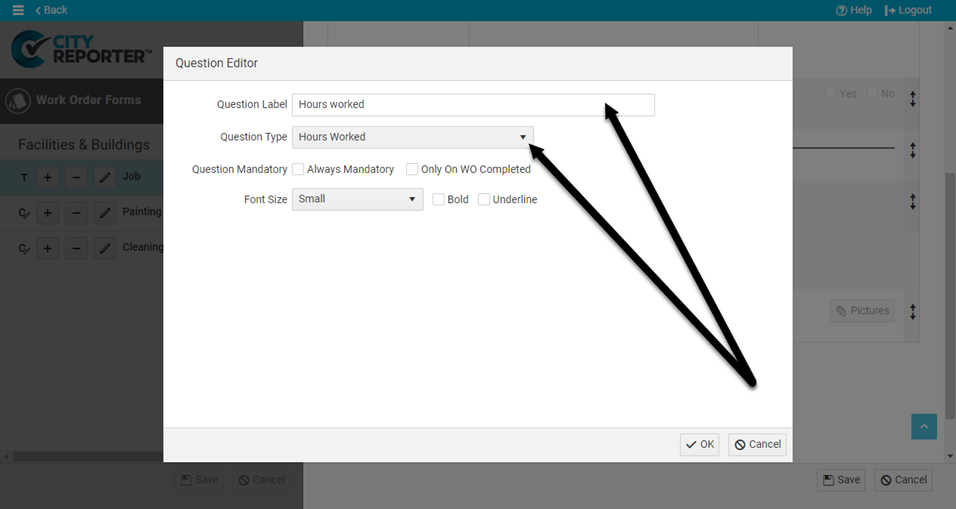
6. Repeat the above steps to add as many questions as you need, using a variety of question types such as checkboxes, text boxes, number fields, and combo drop-downs.
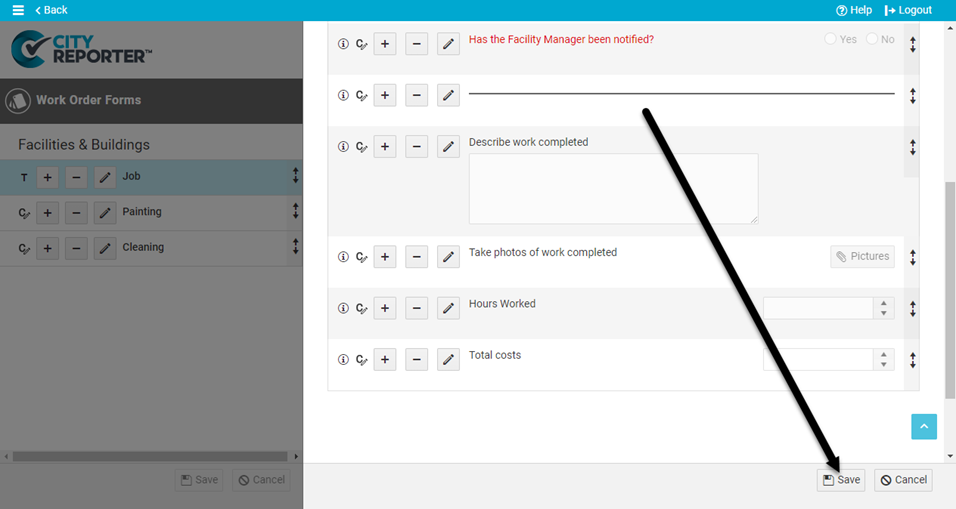
7. Once you have finished adding all of your questions to the Job, click the Save icon at the bottom right of the screen.
8. Remind your users to Refresh CityReporter on their mobile devices to see the updates to the Job Sheet.


