You can configure the software to automatically fill in the Occupancy Approved Date and notify an email address when an occupancy inspection is completed. You can also set up any template or custom form as the Occupancy Permit/Certificate that gets emailed as a PDF to the owner and/or contractor.
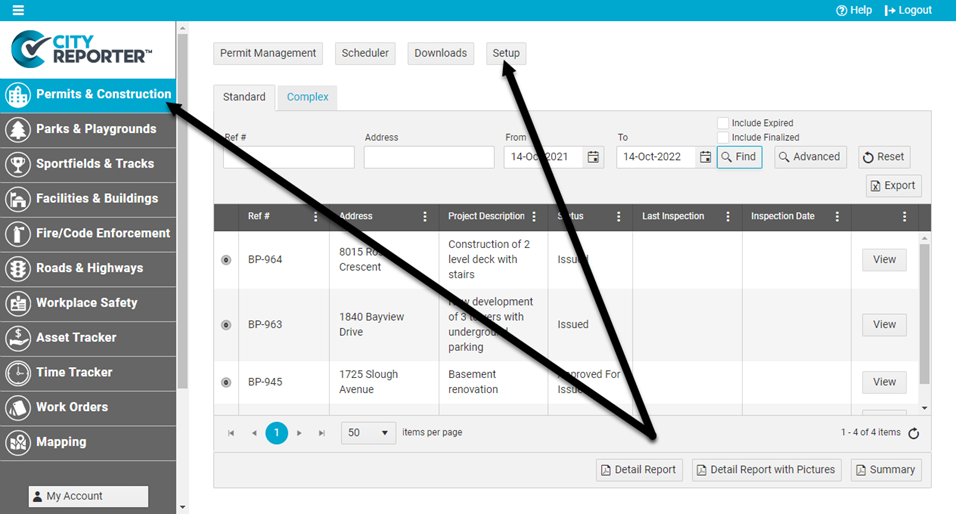
1. Using your computer, log into CityReporter web with your city code, username, and password. Select the Permits & Construction module and click the Setup button at the top of the screen, as shown. You must have Administrator permissions in order to access the Setup button.

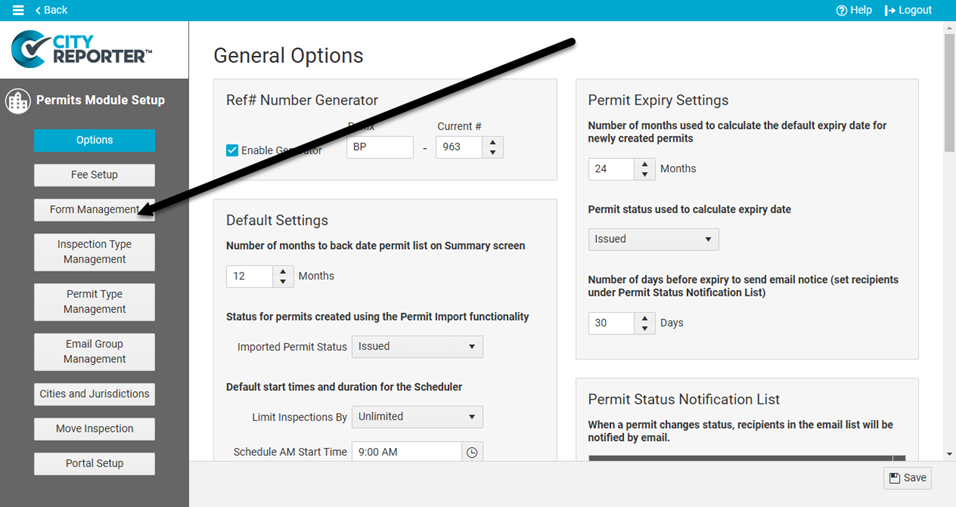
2. Click the Form Management button at the left of the screen.

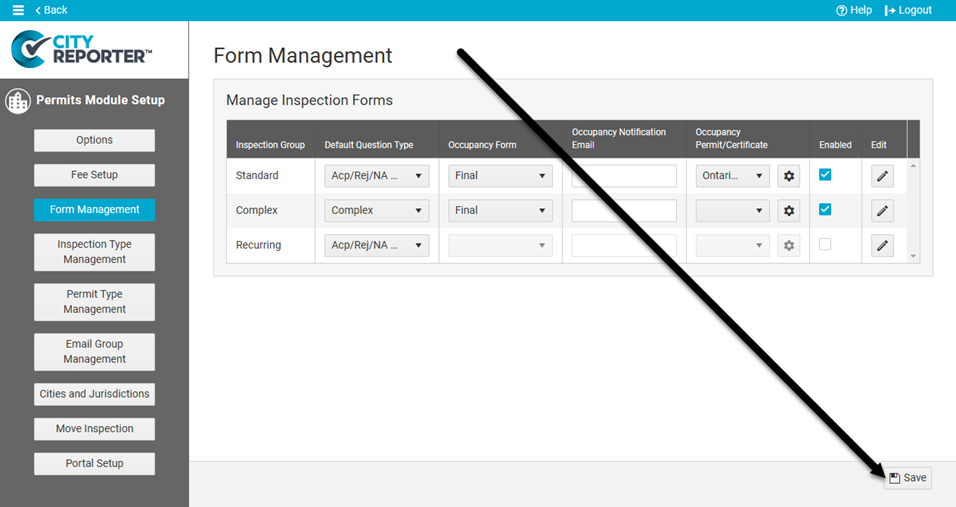
3. Update the following settings as desired.

- Occupancy Form: When an inspection is done on the selected form, e.g. Final, if it has no deficiencies, the inspection date will be recorded as the Occupancy Approved Date for the permit.
- Occupancy Notification Email: When an inspection is done on the Occupancy Form, if it has no deficiencies, a copy of the inspection report will be sent to the email address(es) entered. Click in the field to select user emails from the dropdown list, or type an email address and press Enter.
- Occupancy Permit/Certificate: Select the form that you want to email when providing the owner or contractor with an Occupancy Permit/Certificate.
- Users in Ontario can select the Ontario Occupancy Permit form, which is formatted according to their jurisdiction’s regulations.
- Any form can be customized and set as the Occupancy Permit/Certificate, which will be emailed to the owner and/or contractor as a PDF when an inspection is filed from the mobile app or when you click Send By Email on the inspection screen. See our Forms and Questions Tutorials to get started on creating a form.
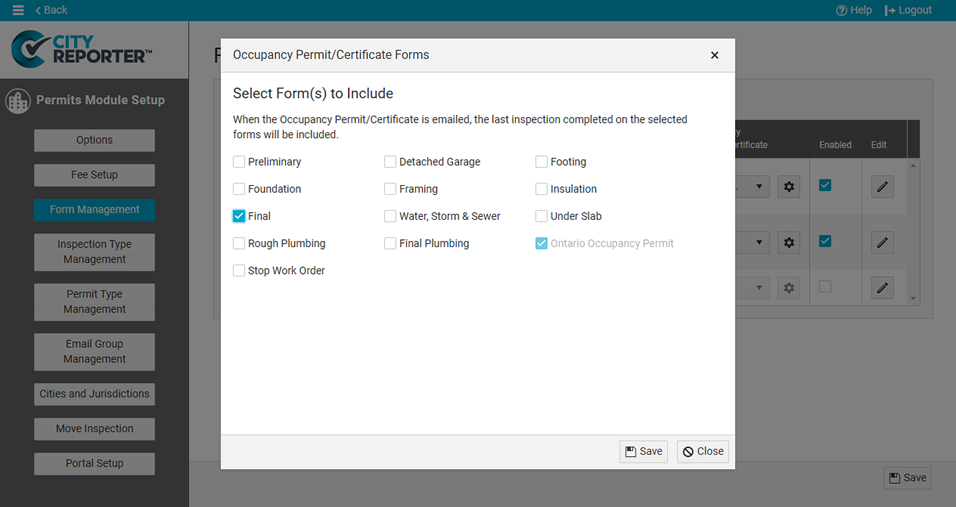
- Click the Settings icon next to the Occupancy Permit/Certificate dropdown to select other forms you want included in the email. When the Occupancy Permit/Certificate is emailed, the last inspection completed on the selected forms will be sent along with the PDF.

4. Once you’re done updating the settings, save your changes by clicking the Save button at the bottom right.


